If you have built a leak testing machine or fixture, you know how difficult it can be to consistently seal up a test part and maintain leak free conditions. The key to leak testing is to test the device under test for leaks. Unfortunately, the seal tooling and all connections to the part get tested every cycle as well. It is critical to have solid/repeatable seal tooling to ensure accurate and consistent leak test readings.
A Seal Leak Test (checking the Master part, seal tooling, airlines, and air fittings for leak free conditions), validates the leak test seal tooling is sound and able to be calibrated.
Prior to setting up a leak testing instrument, it is critical to have a leak free “Master” part and leak free seal tooling. A simple way to ensure that you do have a leak free part and seal tooling is to pressurize the test cavity and spray a bubble producing liquid on the device being tested and all seal tooling (this includes all air connection fittings and tubing as well). This can be challenging as it can be difficult to get a soap solution applied to all possible leak areas. It may also be difficult to visually see the bubbles created by the soap solution depending on the location of the leak.
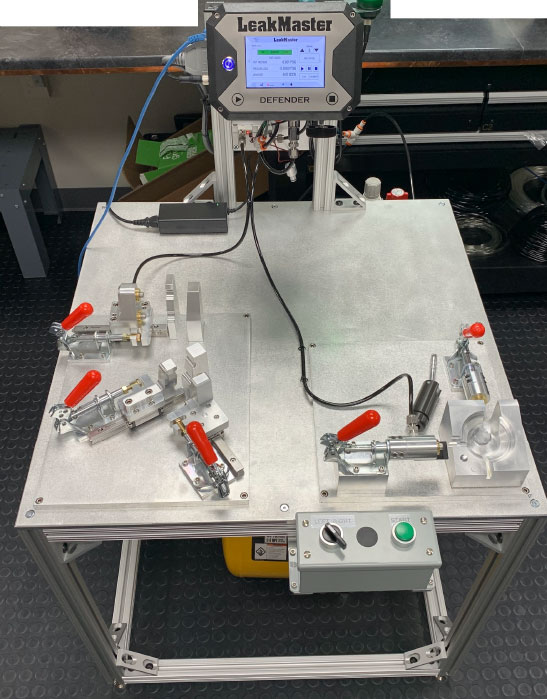
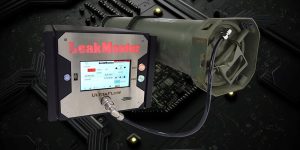
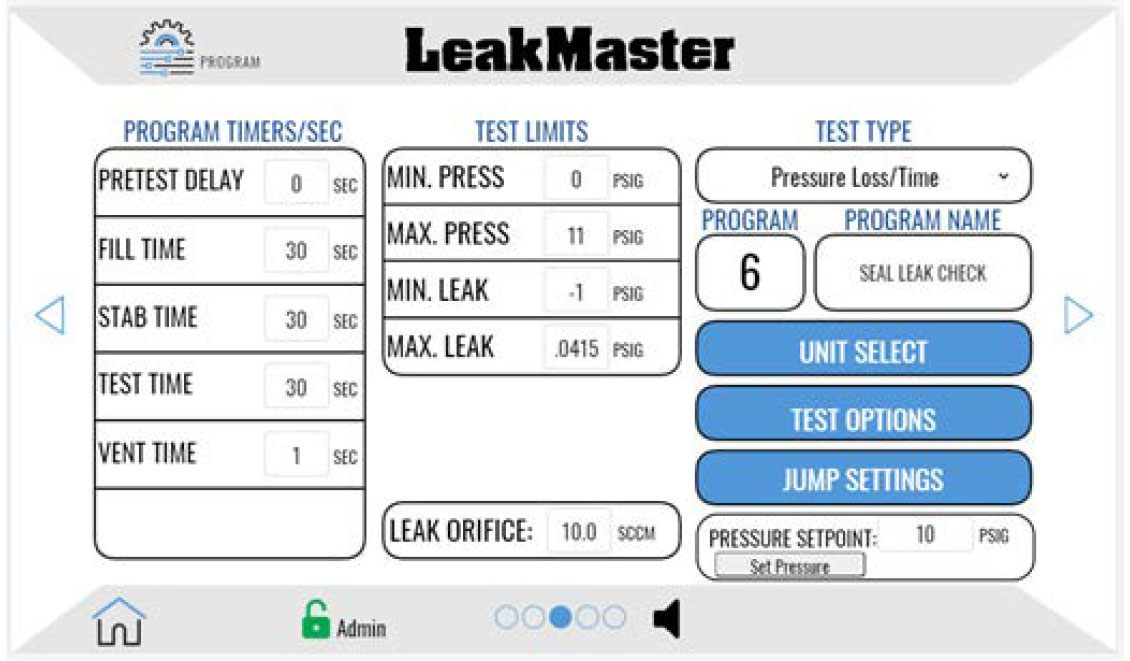
At LeakMaster, we have developed a testing sequence that can be setup in any LeakMaster leak test instrument. We call it a “Seal Leak Test”. This process starts by setting up a leak test program, utilizing the pressure loss over time test method.
Programming Example Shown below using a LeakMaster DEFENDER:
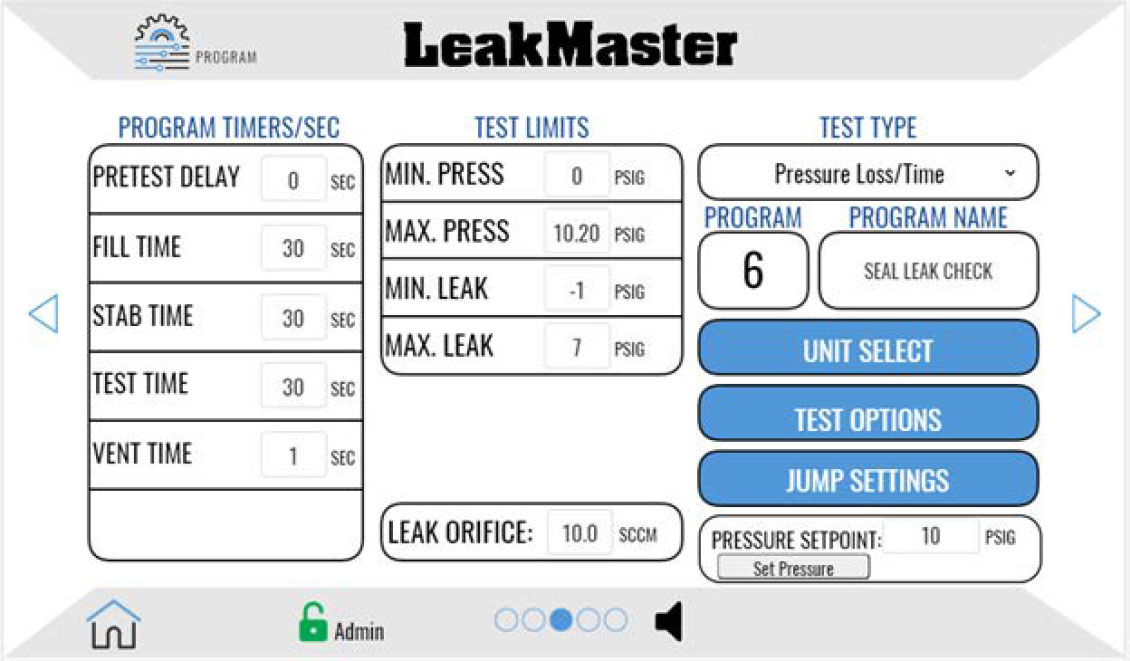
The part size will determine the Fill/Stabilize/Test times. Small parts will use 30 seconds for Fill, 30 seconds for Stabilize, and 30 seconds for Test (Decay) Time.
Medium sized parts will use 60 seconds for Fill, 60 seconds for Stabilize, and 60 seconds for Test (Decay) Time. A large part size would likely require 90 seconds for Fill, 90 seconds for Stabilize, and 90 seconds for Test (Decay) time. The referenced cycle times are much longer than what will be required for production leak testing. The goal is to provide ample fill and stabilization time so we can view the true decay rate of the seal tooling and Master part. Leave the Test limits wide open because we want to complete the test regardless of the leak results.
After you have setup your leak test program, connect your seal tooling to the Master part. Once connected, you can run the leak test program. Upon completion of the test, you will want to document the Pressure Loss value of the non-leaking Master part. For this example, the pressure loss value recorded will be .004. This is the zero-leak value.
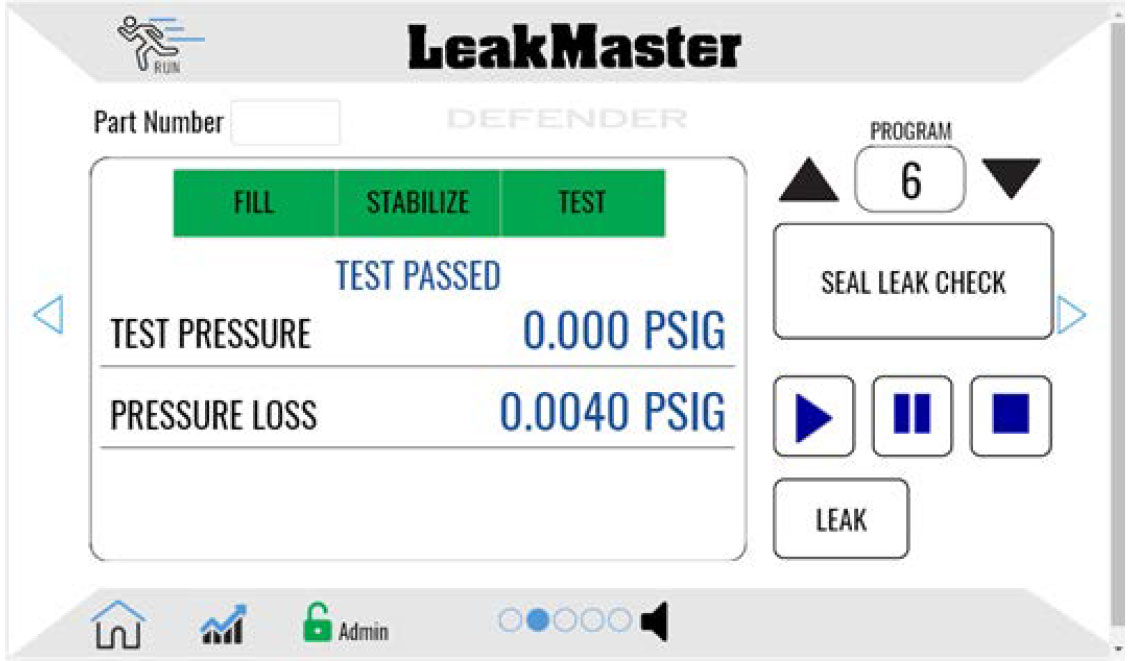
Allow the part to vent/relax for at least 2 minutes. Push the “Leak” button on the Run screen to Enable Leak Mode. The “Leak” button will turn blue when Leak Mode is enabled. Leak Mode turns on the internal calibrated leak standard which will simulate the leak decay rate of a marginally leaking part. Upon completion of the test, document the Pressure Loss value of the simulated leaking part. For this example, the pressure loss value recorded will be .8310. This is the reject leak value.
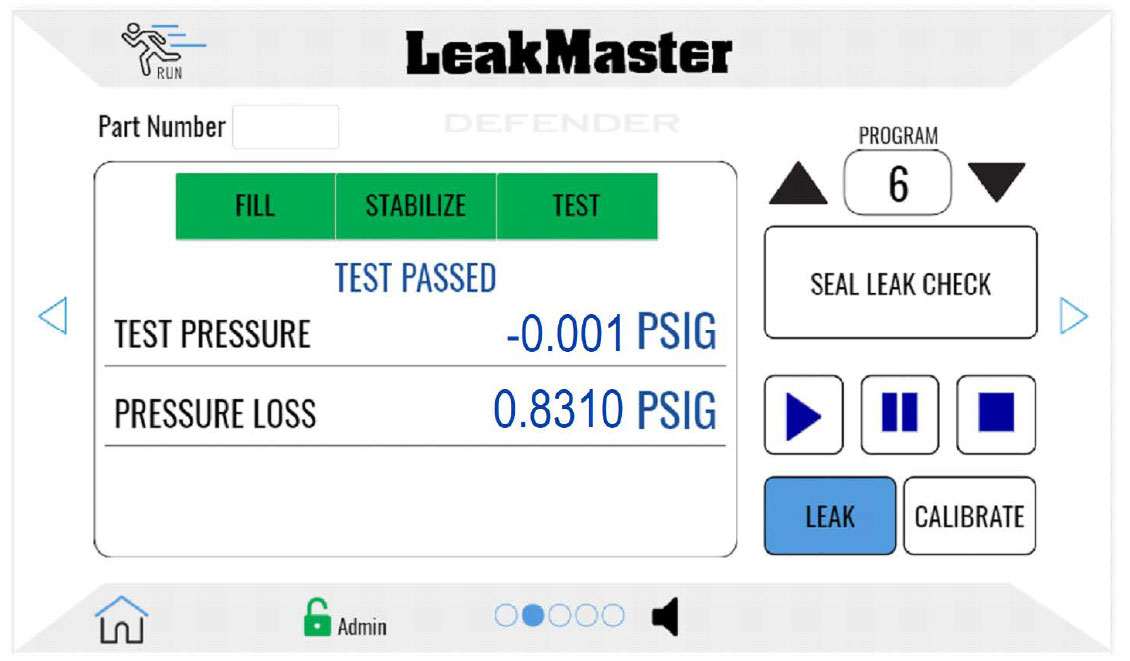
Now, multiply the reject leak value times .05 (5%). For this example, .8310 * .05 equals .04155. The result of this equation must be greater than the documented zero leak value. If this value is less than the documented zero leak value, then you must find the source of the leak in the tooling, fittings, tubing, or part and correct any leaks you find. This is typically done by applying a soap/bubble solution while the part is pressurized. Continue running the Seal Leak Test program with the Master as described above until you pass the test. Passing the test requires that your zero-leak pressure drop is less than 5% of what a reject leak rate pressure drop will produce.
Once you have successfully completed this exercise, you are ready to set up a program and can go back and set reject limits for the Seal Leak Test program as well. For this example, we would take the result from our previous calculation which resulted in a value of .0415. You can enter this value for your Max Leak test limit.
Passing a Seal Leak Test is the backbone of a solid leak testing process. Anytime the seal tooling or master part is questionable, you can run your Seal Leak Test program. If the test passes (after you have put in the proper Max Leak value), you can reliably say the seal tooling and master part are still leak free (or at least 95% leak free).
The information contained in this email is intended for your sucess. With that in mind, when you get asked for a leak testing referral, We hope you will offer our name. We promise to provide our very best service – as we do with all our customers.